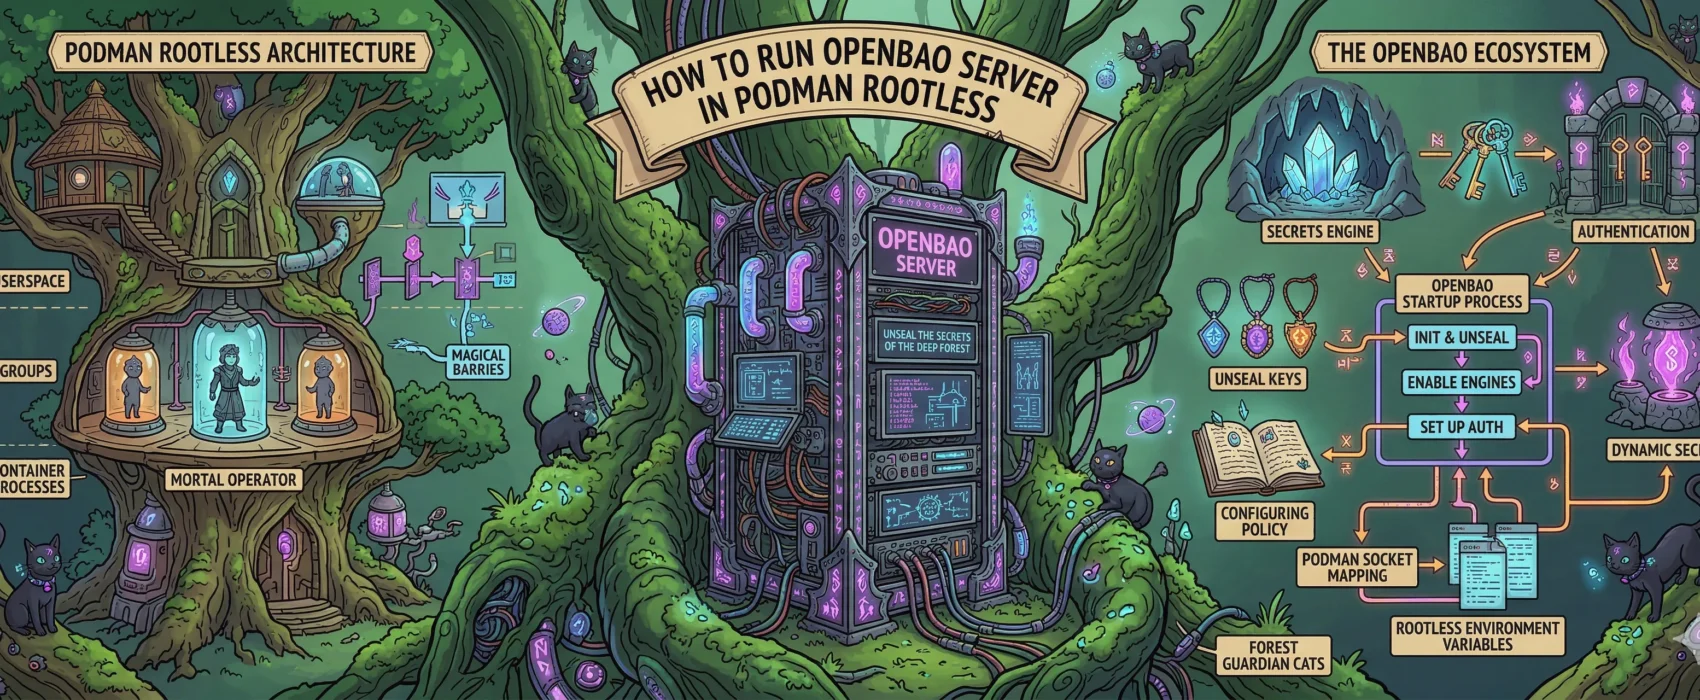
Today, we are setting up OpenBao (the open-source fork of HashiCorp Vault) using rootless Podman on a Hetzner VPS (running openSUSE). This setup ensures your secrets are encrypted at rest, isolated by policy, and running under a non-privileged user.
0. The Infrastructure Script (Setting the Stage)
Before launching the container, we must prepare the host directory. In a rootless environment, UID mapping is tricky. OpenBao runs internally as UID 100, so we use podman unshare to grant that specific “ghost” user permission to our host folder.
First create a directory for your podman compose file and directory creation script.
mkdir openbao-secrets-managerSave this as dir.sh:
#!/bin/bash
INFRA_PATH="/srv/infra/openbao"

echo "Creating OpenBao infrastructure directories..."
sudo mkdir -p $INFRA_PATH/{data,config}
sudo chown -R $USER:$USER /srv/infra

echo "Applying SELinux contexts for openSUSE..."
sudo semanage fcontext -a -t container_file_t "$INFRA_PATH(/.*)?"
sudo restorecon -Rv -F $INFRA_PATH

echo "Applying Podman UID mappings for OpenBao (UID 100)..."
podman unshare chown -R 100:100 $INFRA_PATH/data
chmod 755 $INFRA_PATH

echo "OpenBao is ready at $INFRA_PATH."
Save this as openbao.yml:
name: openbao

networks:
  openbao_external:
    external: true

services:
  openbao:
    image: openbao/openbao:2.5.2
    container_name: openbao-server
    restart: always
    cap_add:
      - IPC_LOCK
    environment:
      BAO_API_ADDR: "http://0.0.0.0:8200"
      BAO_ADVERTISE_ADDR: "http://openbao-server:8200"
      BAO_CLUSTER_ADDR: "http://openbao-server:8201"
      BAO_LOCAL_CONFIG: |
        {
          "storage": {
            "raft": {
              "path": "/openbao/data",
              "node_id": "node1"
            }
          },
          "listener": [{
            "tcp": {
              "address": "0.0.0.0:8200",
              "cluster_address": "0.0.0.0:8201",
              "tls_disable": true
            }
          }],
          "ui": true
        }
    ports:
      - "8200:8200"
      - "8201:8201"
    volumes:
      - /srv/infra/openbao/data:/openbao/data:Z
    command: server
    networks:
      - openbao_external
run ./dir.shthis will create the initial directory structure.
1. Initialization: The “Birth” of the Vault
This command generates your master encryption keys. Copy the output of this command immediately into a secure text file or password manager.
podman exec -it -e BAO_ADDR='http://127.0.0.1:8200' openbao-server bao operator init
⚠️ IMPORTANT: You will see 5 “Unseal Keys” and 1 “Initial Root Token.” Save them now. If you lose them, your data is mathematically unrecoverable.
2. Unsealing: Opening the Door
By design, OpenBao starts “Sealed” (locked). You need to provide 3 out of your 5 keys to load the master decryption key into memory. Run this command 3 separate times, pasting a different key each time:
podman exec -it -e BAO_ADDR='http://127.0.0.1:8200' openbao-server bao operator unseal
(After the 3rd key, the output will show Sealed: false.)
3. Authentication: Becoming Admin
Now, log in as the administrator using that Initial Root Token:
podman exec -it -e BAO_ADDR='http://127.0.0.1:8200' openbao-server bao login
# Paste the Root Token when prompted
4. Enable the Storage Engine
Tell OpenBao to activate the “Key-Value” (KV) engine where your app secrets will live:
podman exec -it -e BAO_ADDR='http://127.0.0.1:8200' openbao-server bao secrets enable -path=secret kv-v2
5. Upload Your Policies (Least Privilege)
We want our apps to be isolated. The API shouldn’t see Web secrets, and vice versa. So first create your policy file for example like this:
path "secret/data/ulyaoth/api" {
  capabilities = ["read"]
}
you save this as ulyaoth-api-policy.hcland then continue with importing it.
# Upload API Policy
cat ulyaoth-api-policy.hcl | podman exec -i -e BAO_ADDR='http://127.0.0.1:8200' openbao-server bao policy write ulyaoth-api -

# Upload Web Policy
cat ulyaoth-web-policy.hcl | podman exec -i -e BAO_ADDR='http://127.0.0.1:8200' openbao-server bao policy write ulyaoth-web -
6. Generate Restricted Tokens
Finally, generate the tokens your apps will actually use. Unlike the Root Token, these tokens are strictly limited to the paths defined in the policies above.
# Generate API Token
podman exec -it -e BAO_ADDR='http://127.0.0.1:8200' openbao-server bao token create -policy="ulyaoth-api"

# Generate Web Token
podman exec -it -e BAO_ADDR='http://127.0.0.1:8200' openbao-server bao token create -policy="ulyaoth-web"
Save these strings! These go into your production environment variables as BAO_TOKEN.
7. Storing the Secrets
Now, move those hardcoded secrets into the secure vault:
# API Secrets
podman exec -it -e BAO_ADDR='http://127.0.0.1:8200' openbao-server bao kv put secret/ulyaoth/api \
    INTERNAL_API_SECRET="your-real-secret" \
    JWT_SECRET="secure-jwt-key"

# Web Secrets
podman exec -it -e BAO_ADDR='http://127.0.0.1:8200' openbao-server bao kv put secret/ulyaoth/web \
    OAUTH_CLIENT_ID="your-id"
Conclusion
You are now 100% set up! Your secrets are stored in a memory-locked vault, your apps are cryptographically isolated.
Troubleshooting
If you’ve tried to run OpenBao and hit “Permission Denied” loops or locking errors, it’s best to wipe the state and ensure the plumbing is perfect.
Run these to reset your environment:
# Bring down existing containers
podman compose openbao.yml down

# Clean the database folder (Using unshare to handle the mapped permissions)
podman unshare rm -rf /srv/infra/openbao/data/*

# Start it back up
podman compose openbao.yml up -d