Archive: This content is maintained for historical reference. Please note that the specific versions and commands may no longer be compatible with modern systems.
This guide provides a clear example of how to set up Tomcat in a Windows environment for those who prefer not to use Linux.
This guide was created with the assumption that you have a single server for your Tomcat installation. Furthermore, this reflects my personal method for installing Tomcat on a Windows machine; therefore, I use IIS as a reverse proxy for Tomcat, as I prefer not to run Tomcat directly facing the internet.
This guide was tested on: Windows Server 2012 R2 Standard
In this guide, I will demonstrate that it is possible to run Tomcat on a Windows machine while using IIS as the web server. So, let’s start!
Before we can use Tomcat, we must install a JDK (Java) version. Let’s do this first.
Step 1: Download and install the JDK
Go to the Java website: Oracle Java SE Downloads
Accept the license agreement and download the “Windows x64 (jdk-8u60-windows-x64.exe)” package. Now, install it!
(Since Oracle updates Java frequently, please download the latest version and ignore if my version above as I not intend to keep this post up to date on every Java update.)
Step 2: Add the JAVA_HOME variable to the server
Right-click on This PC and choose Properties. In the bottom-right section next to your computer name, click on Change settings. In the window that opens, go to the Advanced tab and click on Environment Variables. In the bottom box labeled System Variables, click New and add the following:
- Variable Name: JAVA_HOME
- Variable Value: C:\Program Files\Java\jdk1.8.0_66
It should look like this:
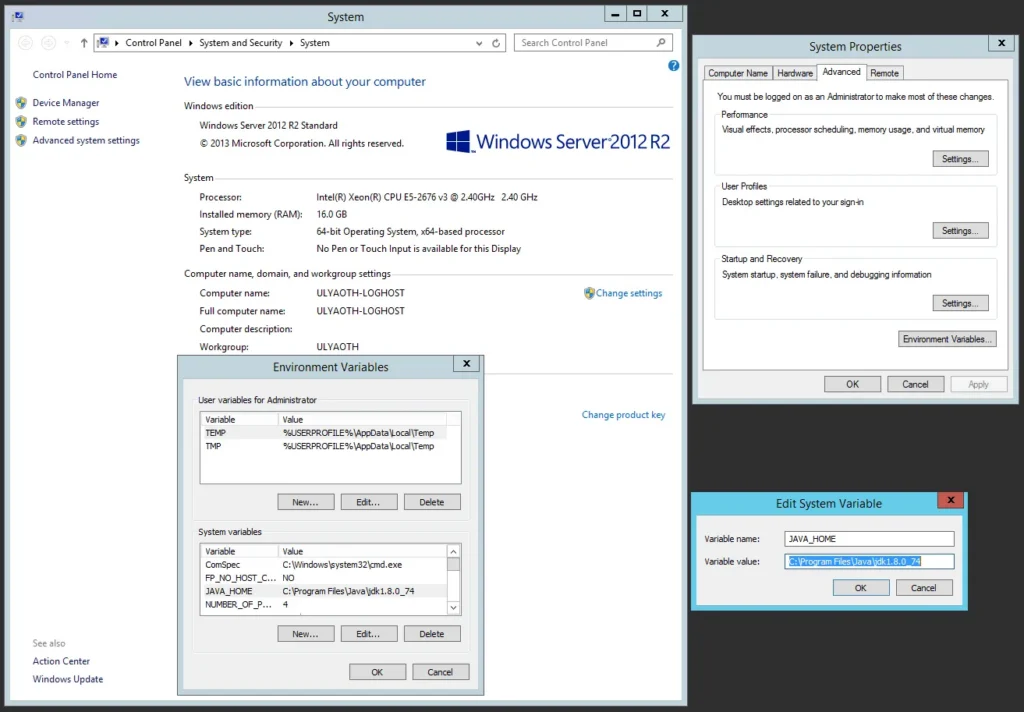
(As mentioned in Step 1, if your Java version is newer, please update the JAVA_HOME entry accordingly.)
Step 3: Download Tomcat
Go to https://tomcat.apache.org/

The file name you are looking for is: Tomcat 8: apache-tomcat-8.0.30.exe
You will find it in the download section. A newer minor version (higher than 8.0.30) will likely work fine, but for a newer major version, the installation process might differ significantly.
Step 4: Install Tomcat
Locate the .exe file you downloaded (“apache-tomcat-8.0.30.exe”) and double-click it to start the installer. You should see the following window:
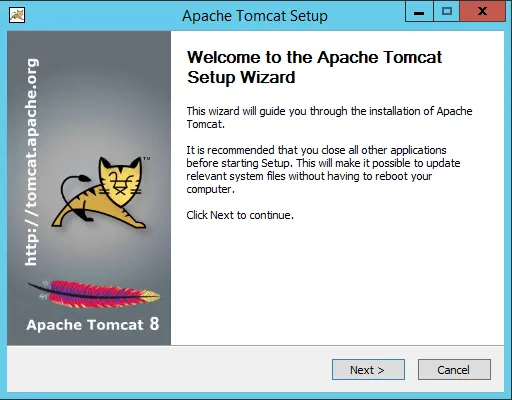
Press the Next button. The following window will appear:
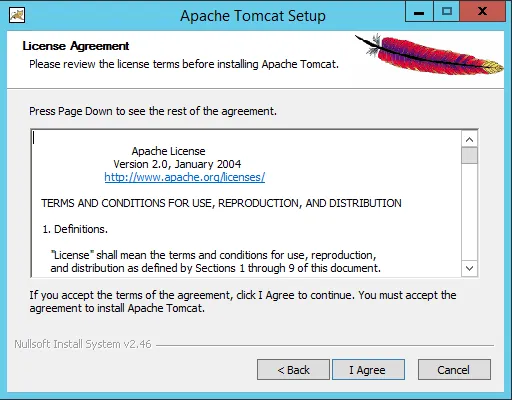
Read the license agreement. If you agree, press the I Agree button to proceed:
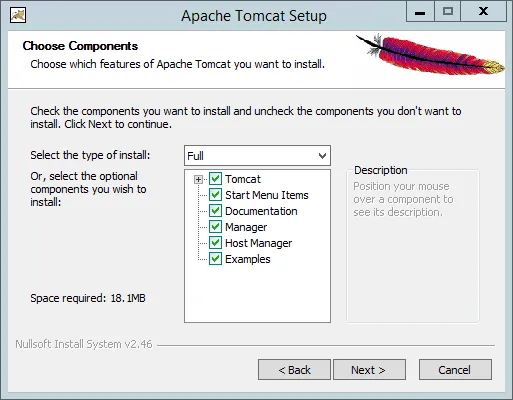
On this window, you can select which components of Tomcat you wish to install. For the sake of this guide, I changed the dropdown menu to Full. Press Next:
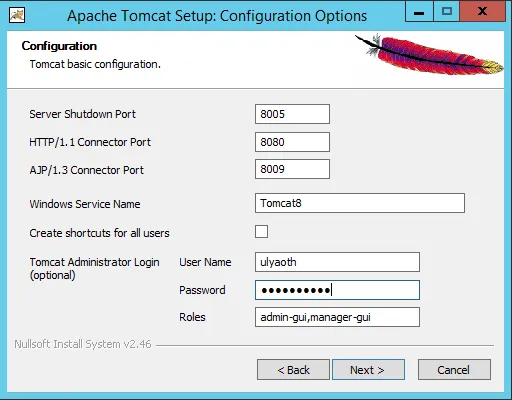
Here, you can choose the ports Tomcat will run on and the name of the Windows service. For this guide, the default settings are fine.
You should, however, add a User Name and Password for the admin section. As you can see, I named my user “Ulyaoth” for this guide; however, you can choose your own. Press Next:
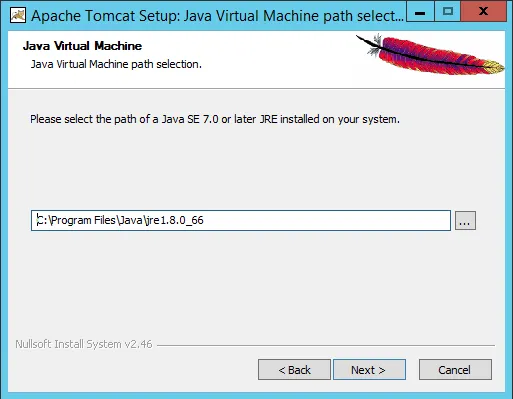
On this window, you can select your Java version. If you followed Step 1 and Step 2, this should be filled in automatically. If you wish to use a Java version from a different location, specify it here and press Next:
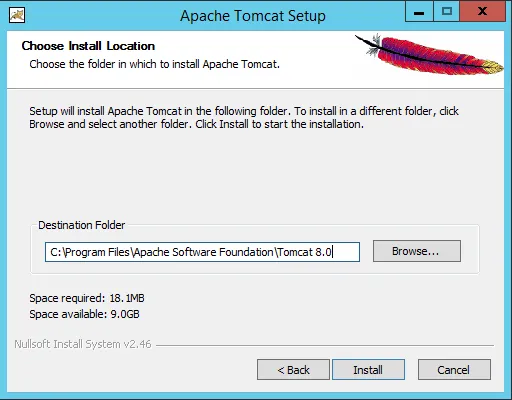
Choose your installation location. On a production system, you would likely want to put Tomcat on a separate disk from the OS, but for this guide, the default location is fine. Press Install:
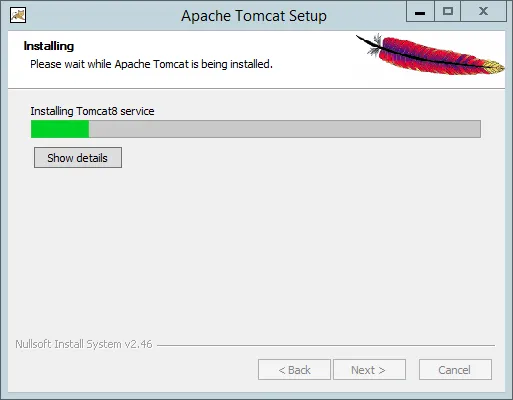
The installation will begin. After a brief moment, you will reach the final window:
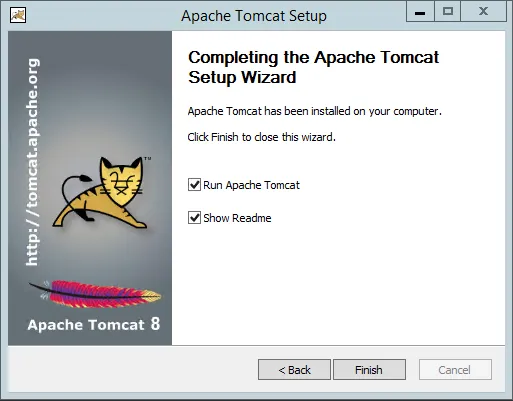
Congratulations! Tomcat is now installed on Windows. To finish, leave the “Run Apache Tomcat” option checked and click Finish.
Tomcat will now start automatically:
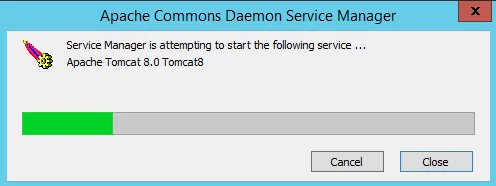
Once it has started, let’s test it. Open a browser and navigate to 127.0.0.1:8080.
You should see something like this:
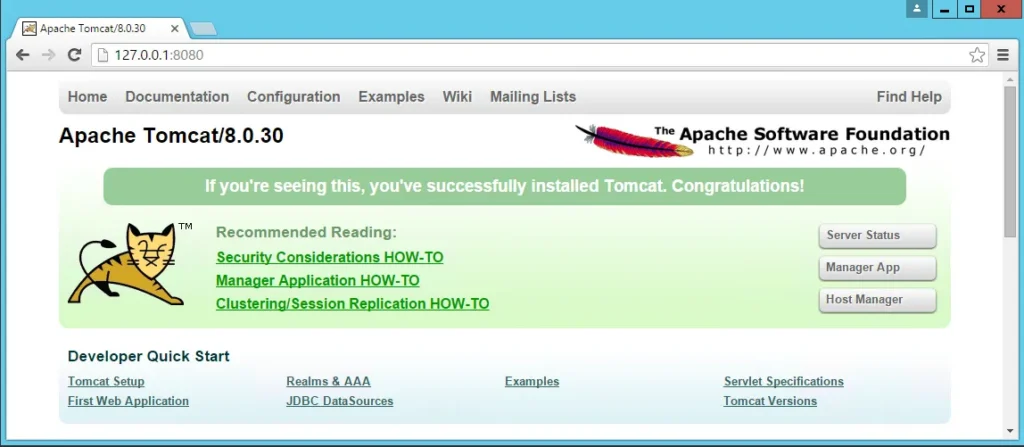
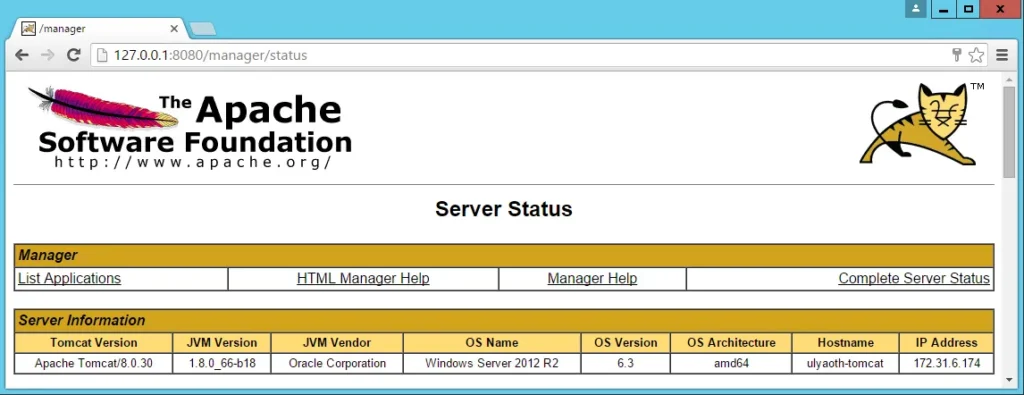
This means your Tomcat installation was successful! To view the server status, click the Server Status button on the page or go directly to 127.0.0.1:8080/manager/status and enter the credentials you created earlier.
You should see the following:
Now, let’s add IIS in front of this on port 80 so we can access Tomcat via the internet.
For this guide, I am using the domain name https://tomcat.ulyaoth.net. You should either change this to a domain you own or add it to your hosts file for testing purposes.
To edit your hosts file, open a command prompt as an administrator and go to: C:\Windows\System32\drivers\etc
Type: notepad hosts
In the Notepad window, add the following line to the bottom:
127.0.0.1 tomcat.ulyaoth.netStep 5: Install IIS
On Windows Server: Go to Server Manager and choose Add Roles and Features Wizard. Select Web Server (IIS) and proceed with the installation.
On Windows 10/11: Go to Control Panel > Programs and Features > Turn Windows features on or off. Find and check Internet Information Services.
Step 6: Install Microsoft Web Platform Installer 5.0
Download the installer from: Microsoft Web Platform
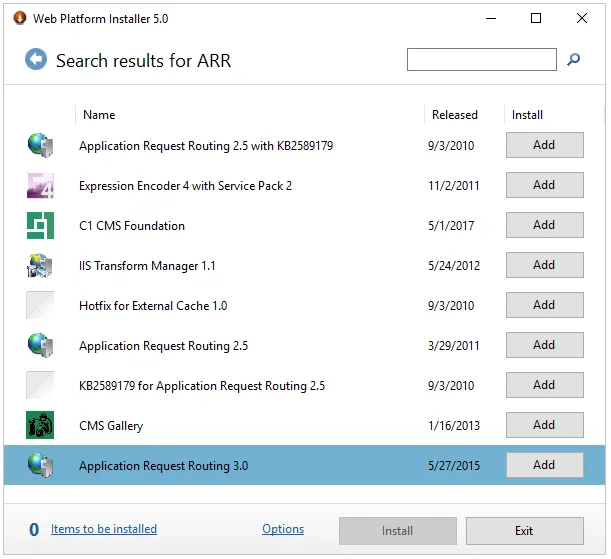
Run wpilauncher.exe. Once the app opens, use the search box in the top-right corner.
Type ARR and press Enter. Locate Application Request Routing 3.0 and click Add:
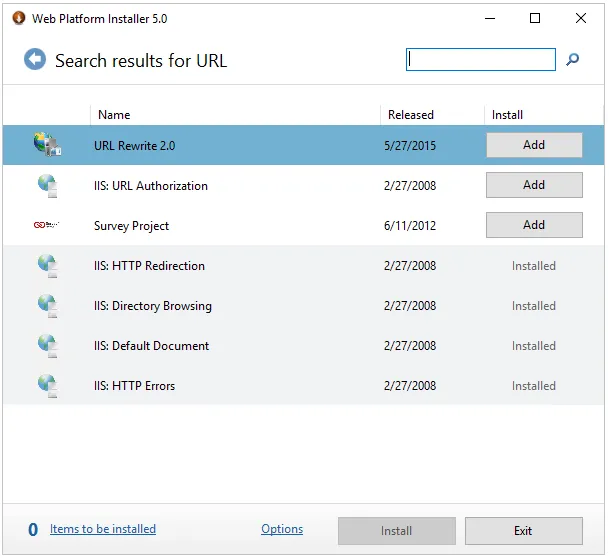
Next, search for URL Rewrite. Locate URL Rewrite 2.0 and click Add:
Click Install. A popup will appear:
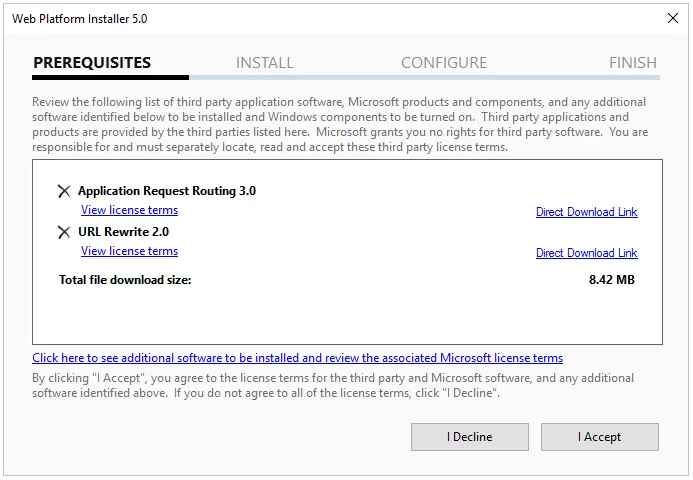
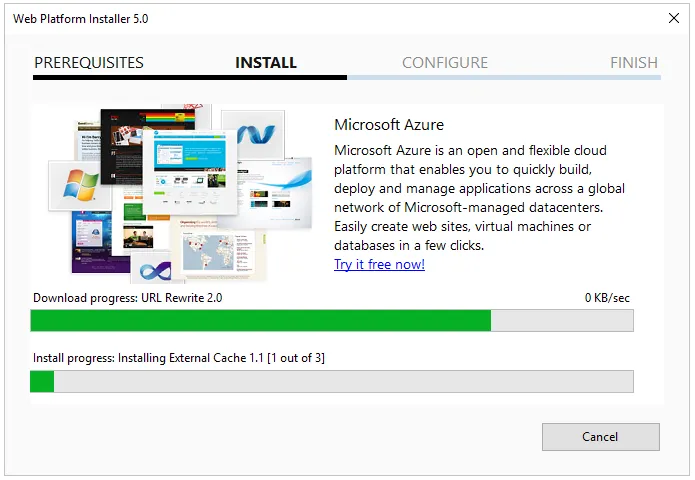
Review the items and click I Accept. The installation will begin:
Once finished, a confirmation window will appear:
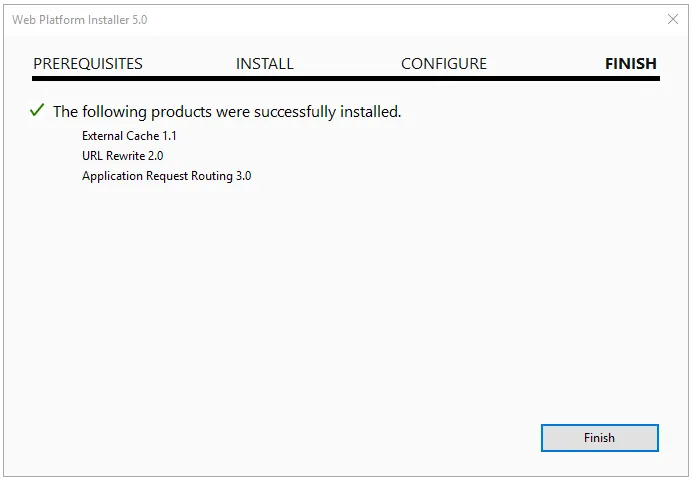
Click Finish and then Exit.
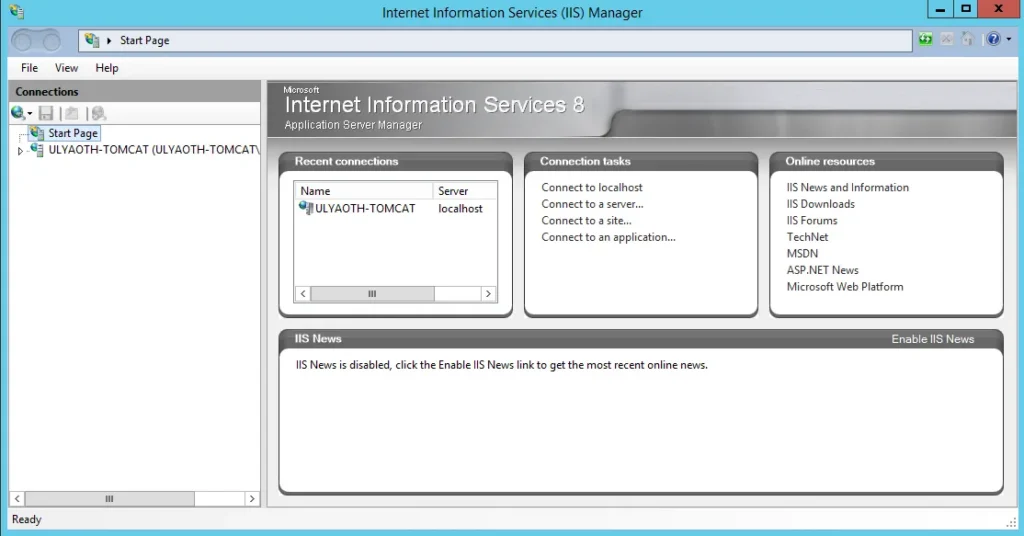
Step 7: Open IIS Manager
Open the IIS Manager; you should see a window like the one below:
Step 8: Create a new website for Tomcat
Right-click on Sites in the left pane and select Add Website. Fill in the details as shown:
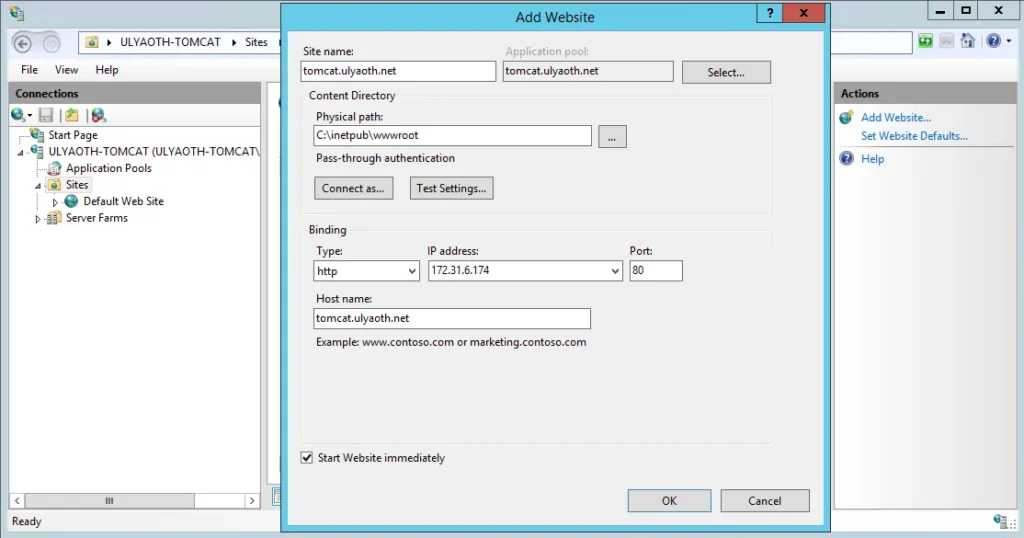
If you are using a certificate, choose https under Binding and select your certificate. If you are following my example, remember to use the hostname you added to your hosts file.
Now, we will create the reverse proxy. This can be done in two ways: proxying all traffic to Tomcat, or using a combination of IIS and Tomcat (where only specific subfolders are sent to Tomcat).
Step 9a: Reverse proxy for ALL traffic
Click on your website name in the left pane (e.g., “tomcat.ulyaoth.net”). Several icons will appear in the center:
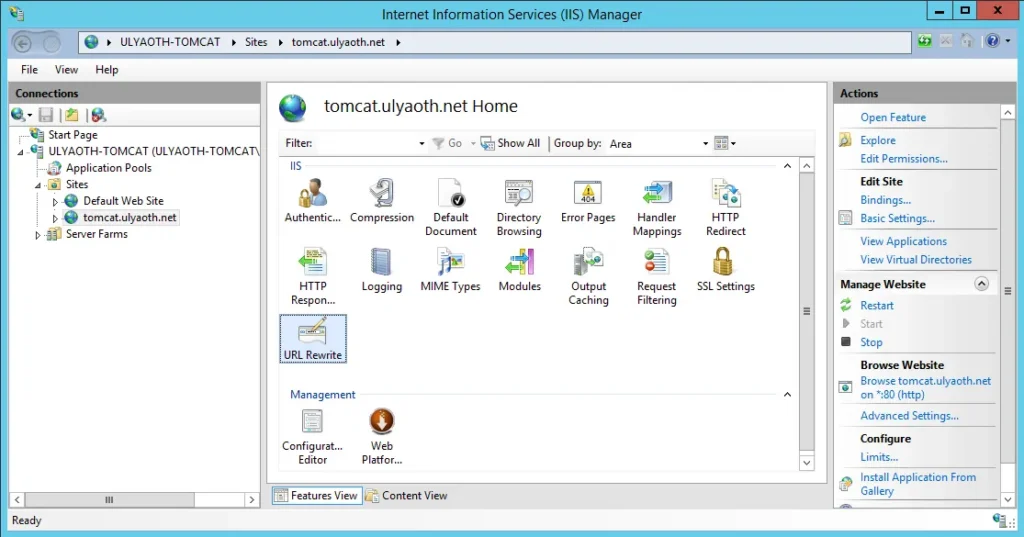
Double-click URL Rewrite. In the right-hand Actions pane, click Add Rule(s)…:
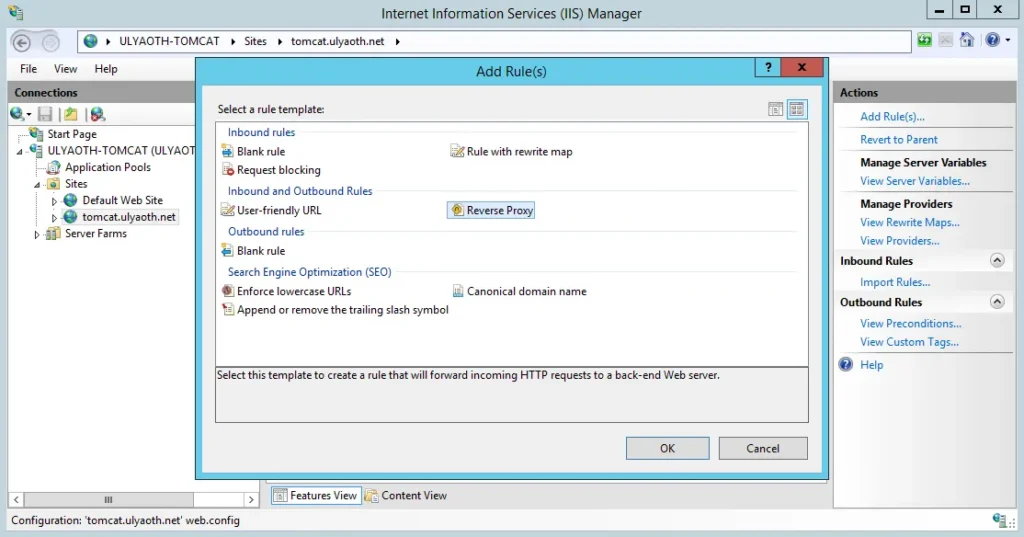
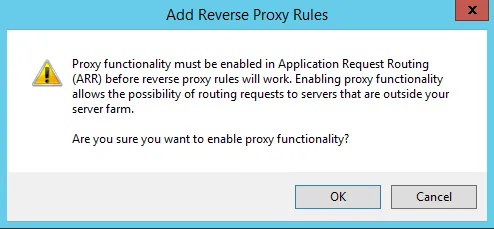
Select Reverse Proxy. You may see a warning message regarding ARR; click OK:
In the Reverse Proxy window, fill it out as follows:
Inbound Rules: 127.0.0.1:8080If you chose “https” for your website, also check Enable SSL Offloading.
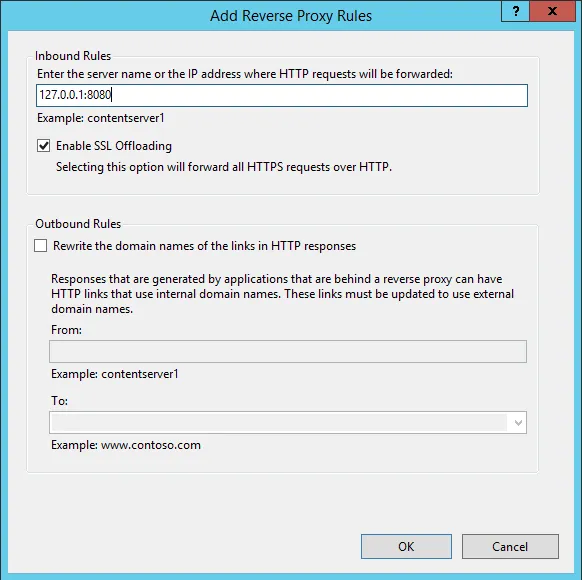
Click OK. To summarize: you are pointing IIS to 127.0.0.1:8080 (where Tomcat is running), creating a “tunnel” for external users. If you change Tomcat’s port later, you must update this rule.
Test it by browsing to tomcat.ulyaoth.net:
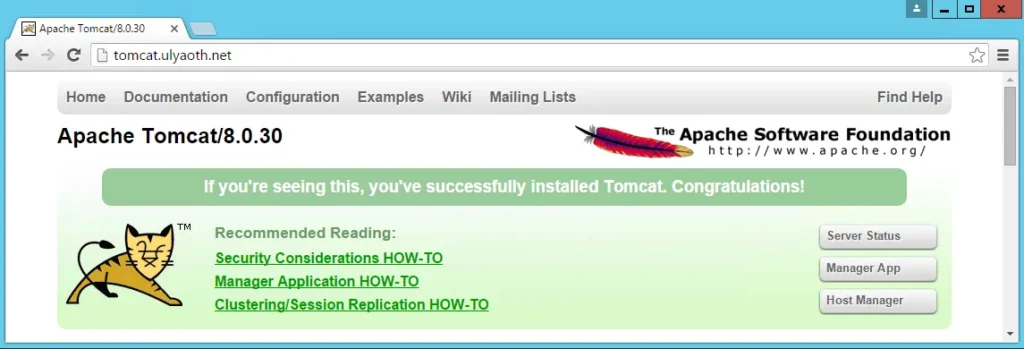
All traffic is now being handled by Tomcat through IIS.
Step 9b: Reverse proxy for SPECIFIC folders only
First, follow the steps in 9a to create the base rule. Then, return to the URL Rewrite tab:
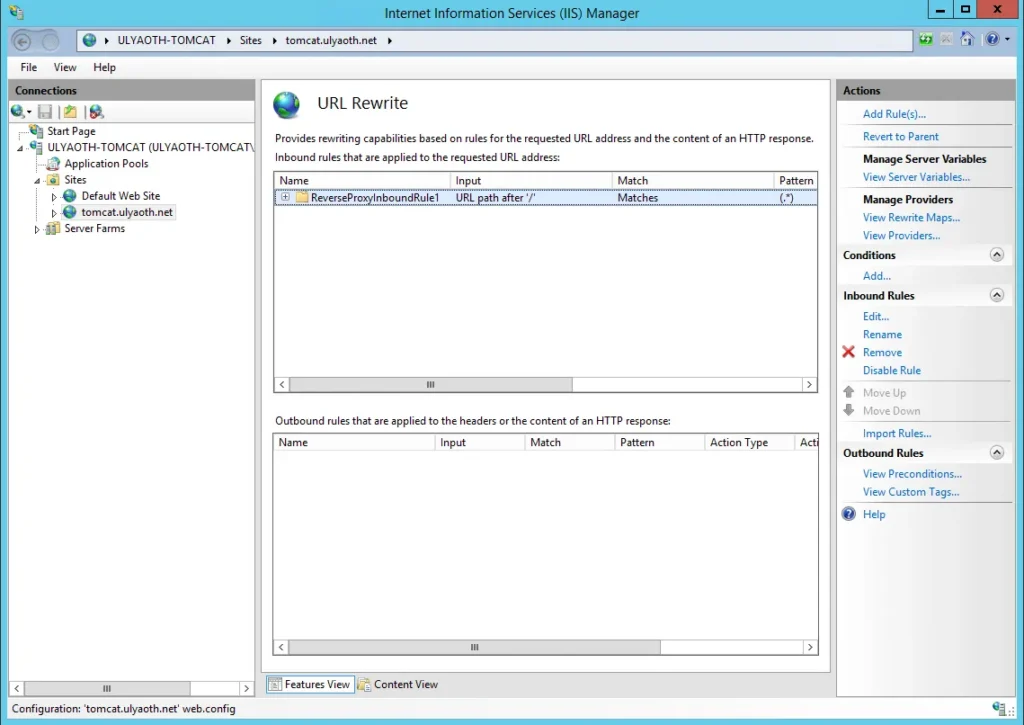
Double-click the rule called ReverseProxyInboundRule1:
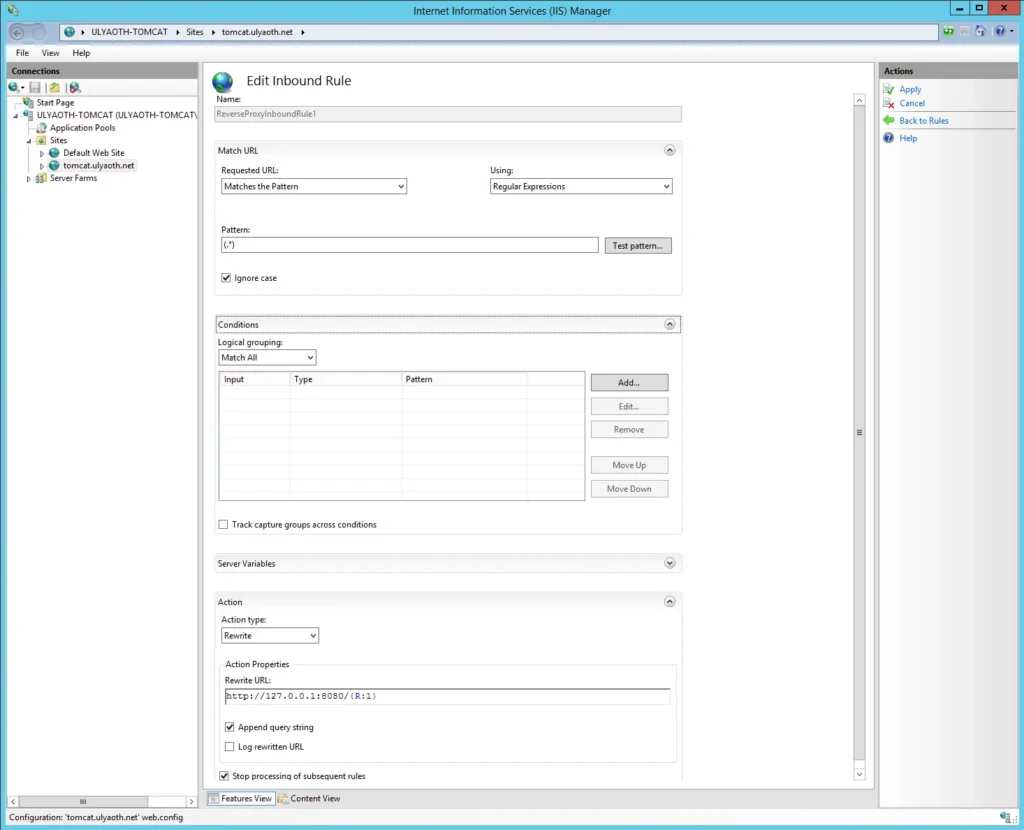
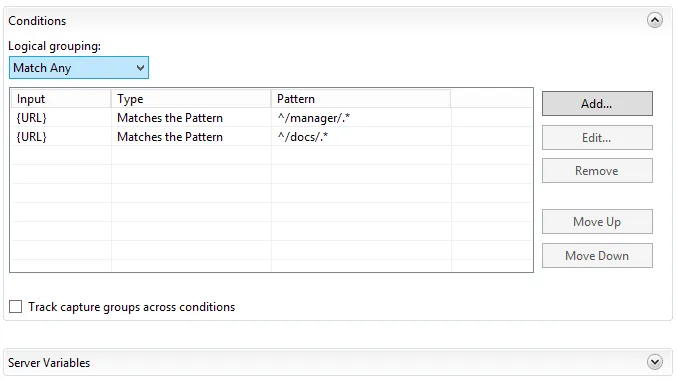
Expand the Conditions section. Currently, this rule sends everything to Tomcat. To change this, click Add… in the Conditions box:
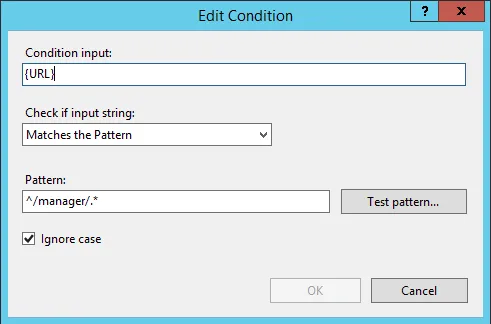
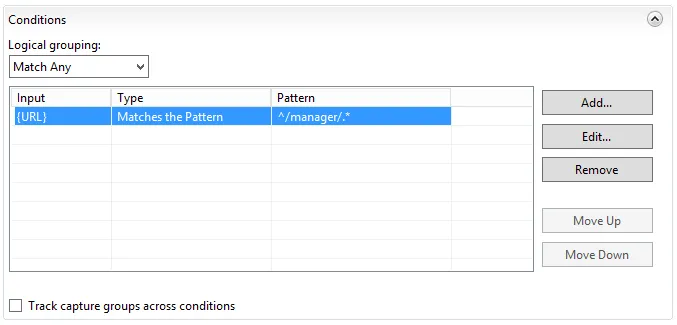
Fill it in as shown above and press OK. You should see the condition added:
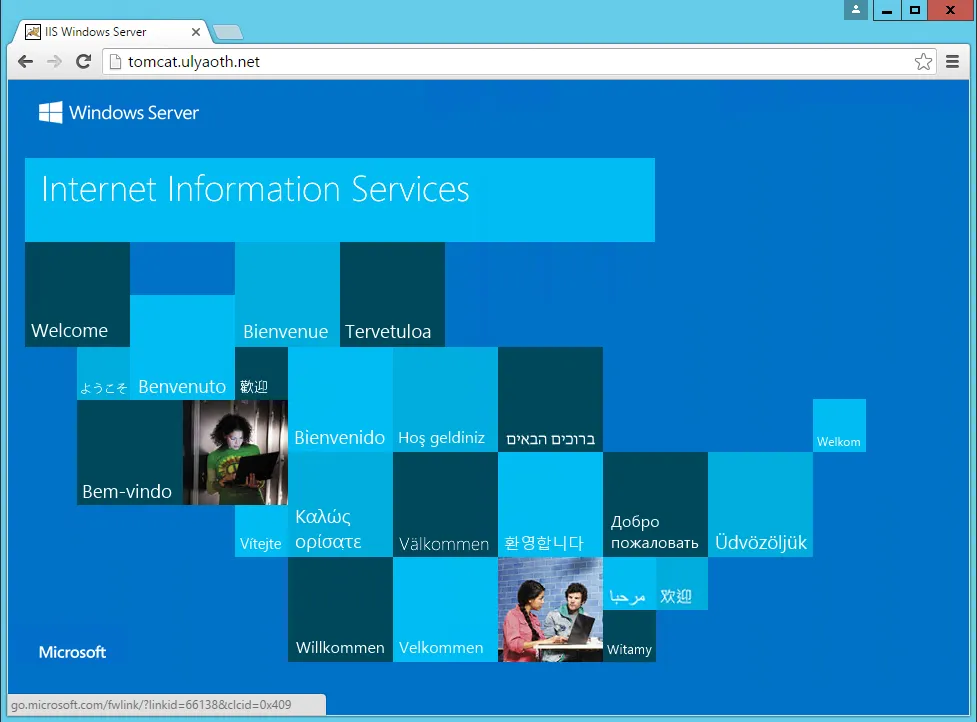
Click Apply in the top-right corner to save. Now, if you browse to tomcat.ulyaoth.net, you will see the default IIS page:
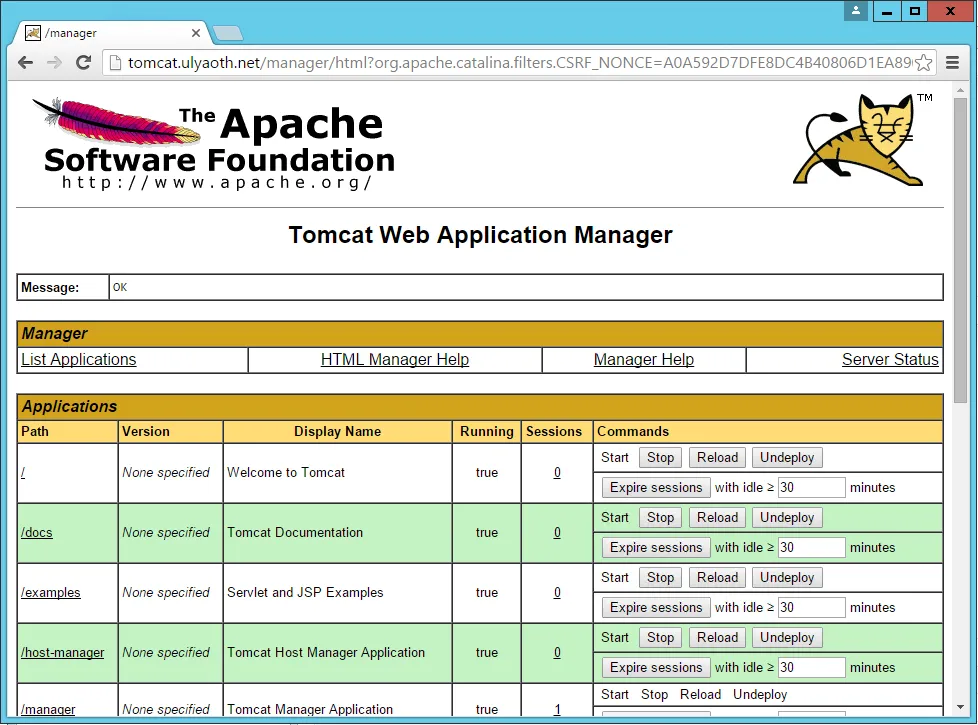
However, if you navigate to tomcat.ulyaoth.net/manager/, the reverse proxy will correctly point to Tomcat:
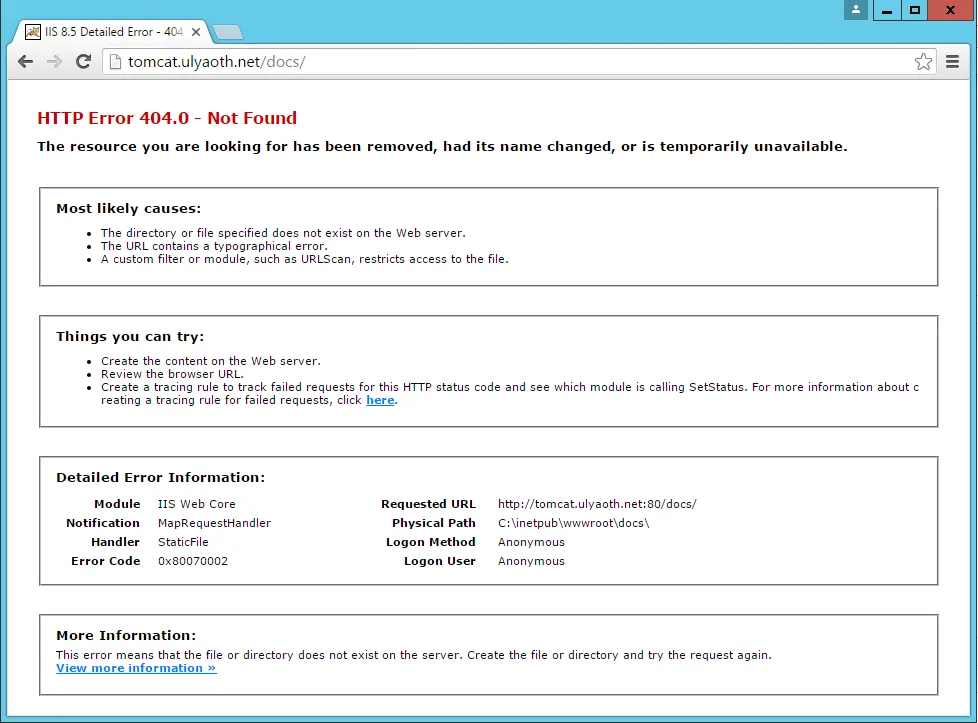
To add more folders, simply add more conditions. For example, to add the Tomcat documentation (/docs/), which currently shows an error:
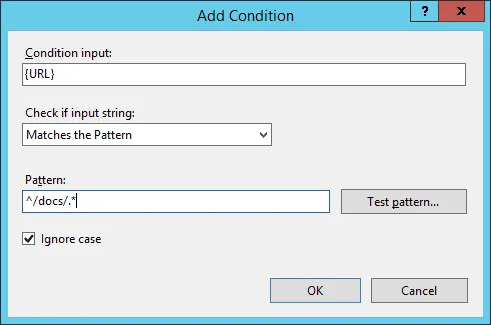
Add another condition to your rule:
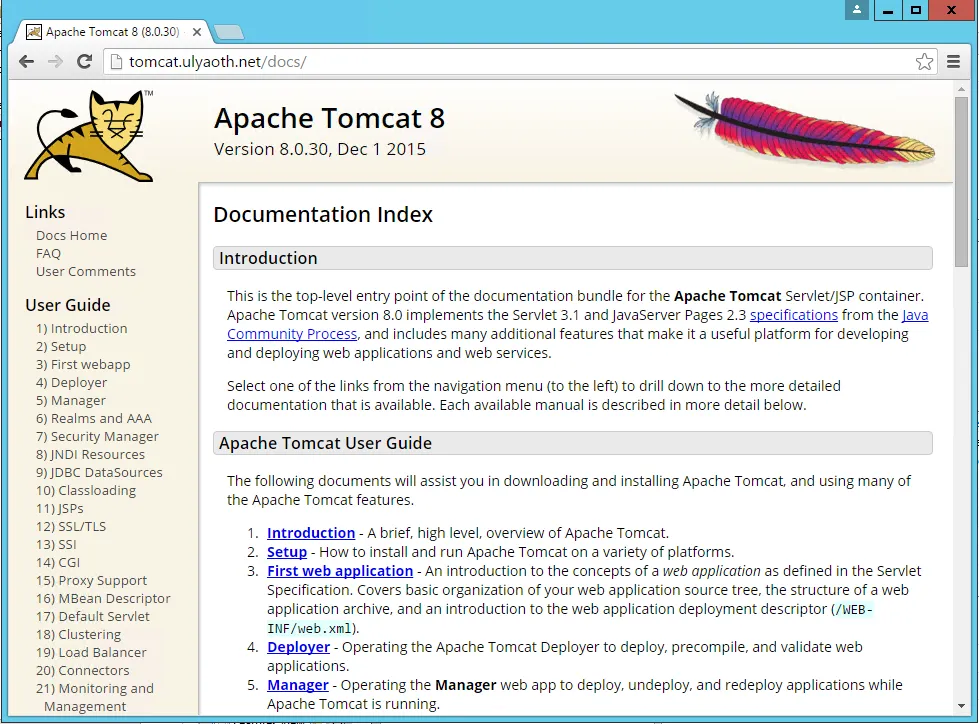
Now, navigating to tomcat.ulyaoth.net/docs/ works correctly:
That’s all! I hope this guide helps you get Tomcat running smoothly on Windows.