Disclaimer: This post is archived for historical purposes. The methods and software versions described here (Heimdall, Fedora 20, Galaxy S5) are outdated and likely no longer work with modern devices. Proceed at your own risk.
Below, I’ve written instructions on how to flash new firmware to your Galaxy Series phone using a non-Windows environment.
I am using macOS for this guide, but you can download Heimdall for Windows, Linux, and Mac from the official Heimdall website. If you are using Fedora 20+, you can simply install Heimdall using yum.
Precaution: Remove your SD card from your phone before you continue.
Required Hardware
- A Samsung Galaxy Series phone (I am using a Galaxy S5 SM-G900F).
- A high-quality USB cable.
Required Software
- Heimdall: The cross-platform open-source tool for flashing Samsung devices.
- Firmware ROM: Any ROM you wish to use. I use the Swedish ROM, downloadable from sites like SamMobile.
Step 1: Install Heimdall (Console & Frontend)
- Windows: Use the standard installer.
- macOS: Use the
.dmginstaller. - Fedora 20+: Run the following command:
$ sudo yum install heimdall-frontend heimdall - Other Linux: Use the specific installation files for your distribution from the Heimdall website.
Step 2: Create a folder for your ROM
On Windows, you can do this graphically. On macOS and Linux, use the terminal:
$ mkdir SM-G900FStep 3: Extract your ROM into the folder
If you extract the files correctly (using the Swedish ROM as an example), you should see the following files in your folder:
cache.img/cache.img.ext4system.img.ext4recovery.imgboot.imgmodem.binaboot.mbn,sbl1.mbn,rpm.mbn,tz.mbn,sdi.mbn,NON-HLOS.bin
Note: If your file list looks significantly different, double-check that you downloaded the correct firmware for your specific model. Flashing the wrong files can brick your device. Note that you may not need to use every single one of these files.
Step 4: Start Heimdall
- Windows/macOS: Launch the installed application.
- Linux: Run
$ heimdall-frontend.
Note on Linux Permissions: Heimdall requires USB permissions. If your user account doesn’t have them, the flash will fail. You can technically run it with sudo heimdall-frontend, but it is better practice to fix your USB/udev permissions instead (though that is outside the scope of this guide).
Step 5: Boot your phone into Download Mode
- Power OFF your phone.
- Press and hold VOLUME DOWN, HOME, and POWER simultaneously until you see a warning message.
- Follow the onscreen instructions and press VOLUME UP to enter Download Mode.

Step 6: Test the connection
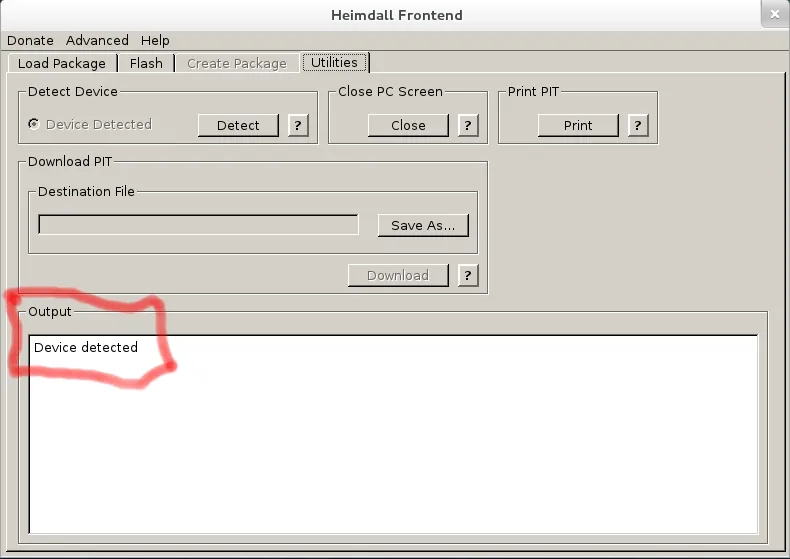
In Heimdall, go to the Utilities tab and click Detect under “Detect Device.”
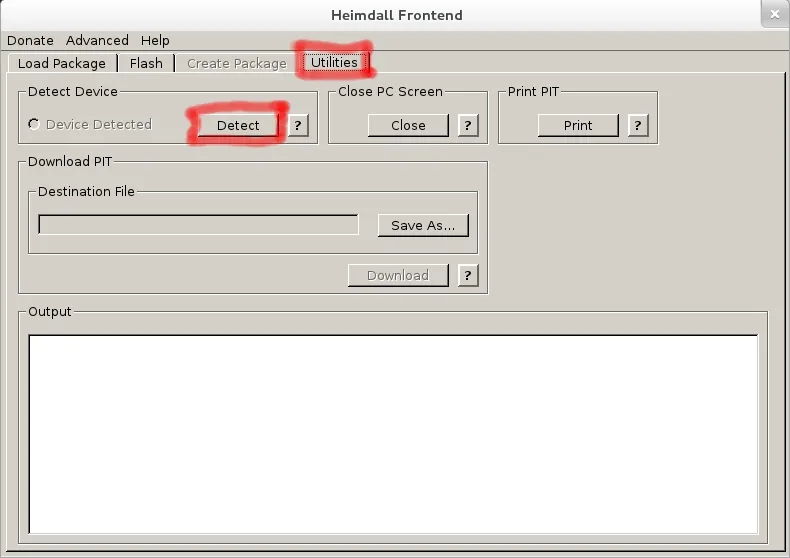
The Output window should indicate if your device has been detected.
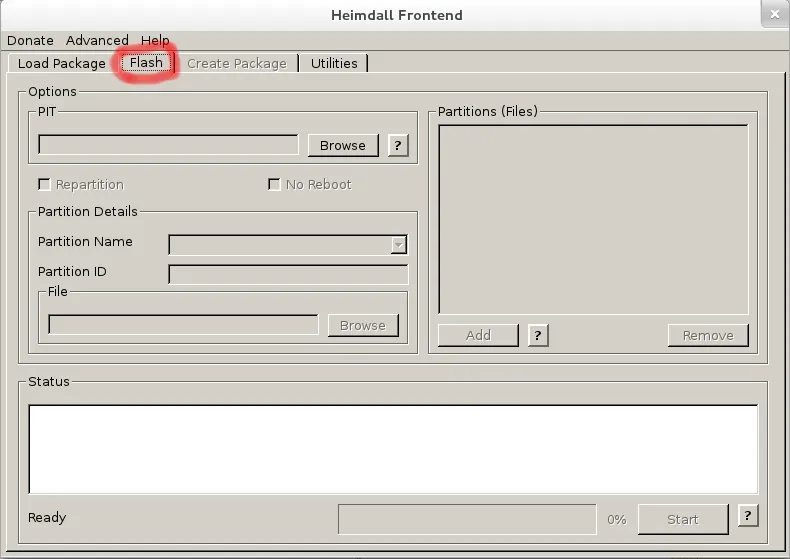
Step 7: Access the Flash tab
Go to the Flash tab in the Heimdall interface.
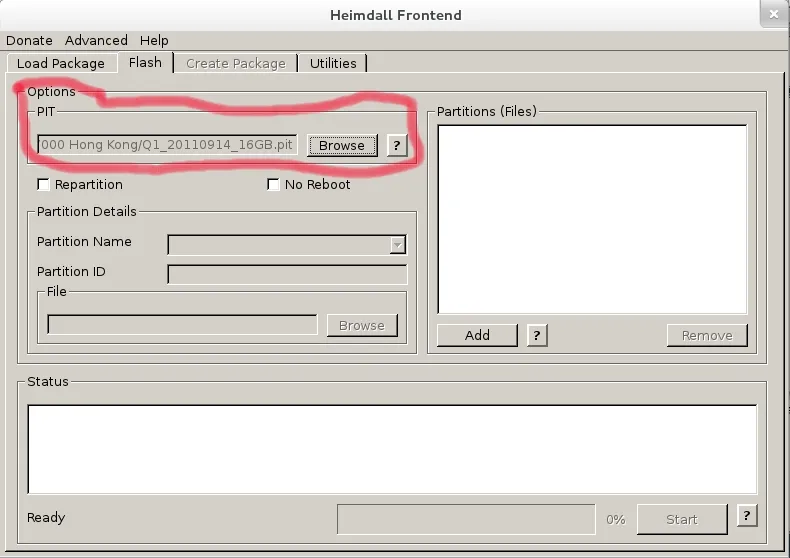
Step 8: Select your PIT file
Under the PIT section, click Browse and select your .pit file (e.g., Q1_20110914_16GB.pit).
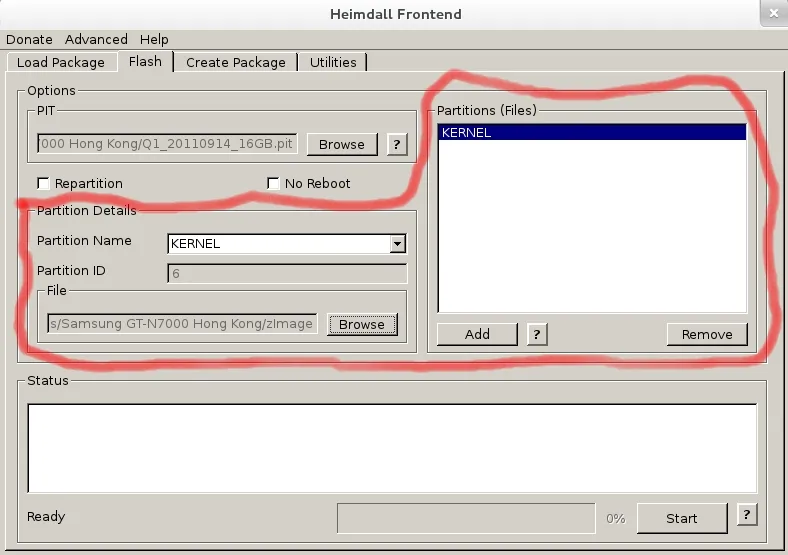
Step 9: Map your ROM files
In the “Partition Details” window, click Add. Select the Partition Name from the dropdown, then click Browse to link the corresponding file.
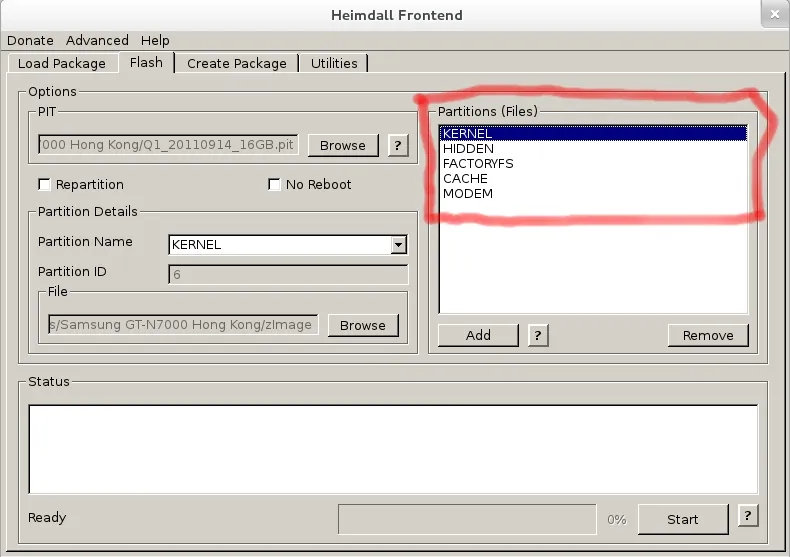
Repeat this for the following mappings:
- KERNEL:
zImage(orboot.img) - HIDDEN:
hidden.img.ext4 - CACHE:
cache.img.ext4 - MODEM:
modem.bin - FACTORYFS:
factoryfs.img(orsystem.img.ext4)
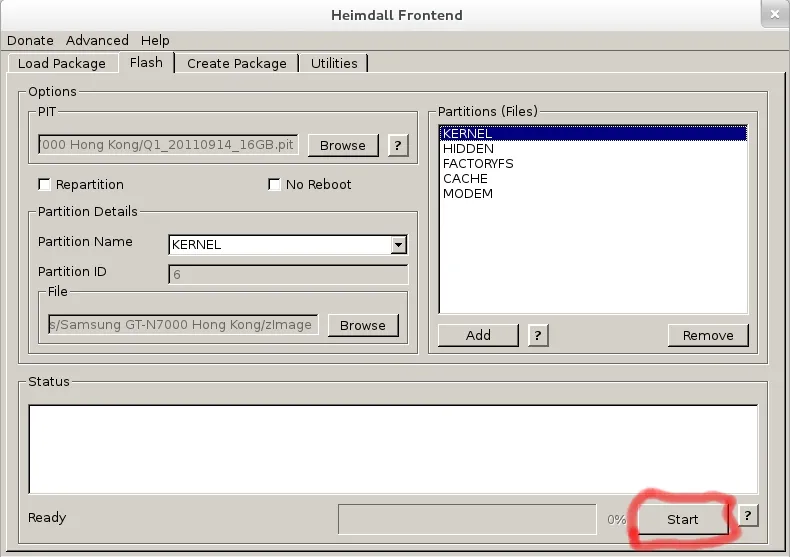
Step 10: Start Flashing
Click Start on the Flash tab and pray everything goes well! 🙂
That’s all! Your phone will automatically reboot, and you will be running your new ROM.