Archive: This content is maintained for historical reference. Please note that the specific versions and commands may no longer be compatible with modern systems.
Over the years, I have received many questions about how to SSH into a VirtualBox machine from a host PC.
Note: If you have the option to use Bridged Networking, you can SSH into your VM without this guide. This tutorial is specifically for those who cannot or do not want to use a bridged network.
Prerequisites
- This guide uses a Fedora virtual machine. While the logic applies to any Linux distribution, file locations may differ if you are using a non-Red Hat-based system (like Ubuntu).
- On macOS, you must first create a “Host-only Network” in the global VirtualBox settings before it will appear in the VM settings.
Step 1: Stop Your Virtual Machine
Shut down your VirtualBox guest. These hardware changes require the OS to be powered off to take effect.
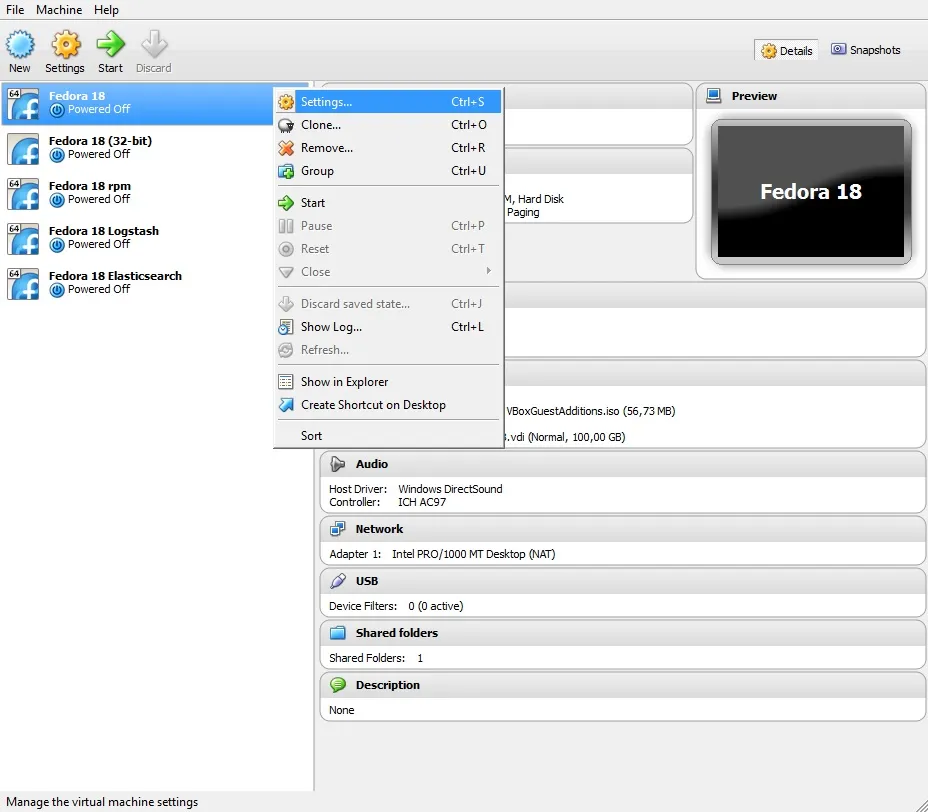
Step 2: Open VM Settings
Right-click your virtual machine and select Settings, or select the machine and press Ctrl + S.
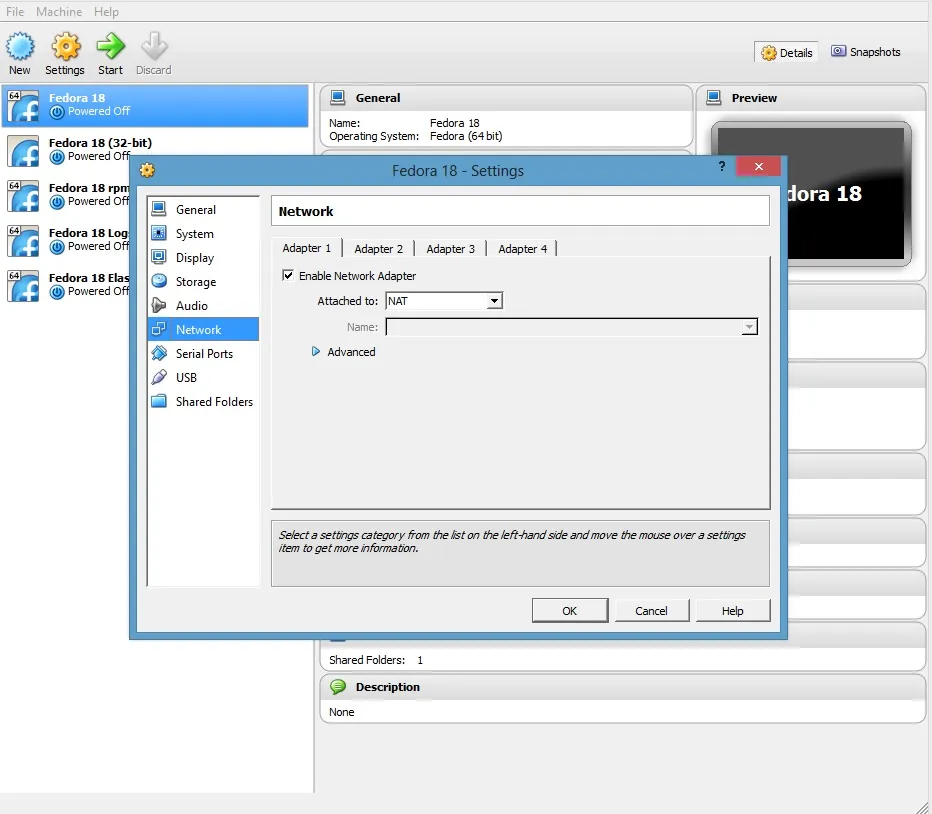
Step 3: Navigate to the Network Tab
Select the Network menu from the sidebar.
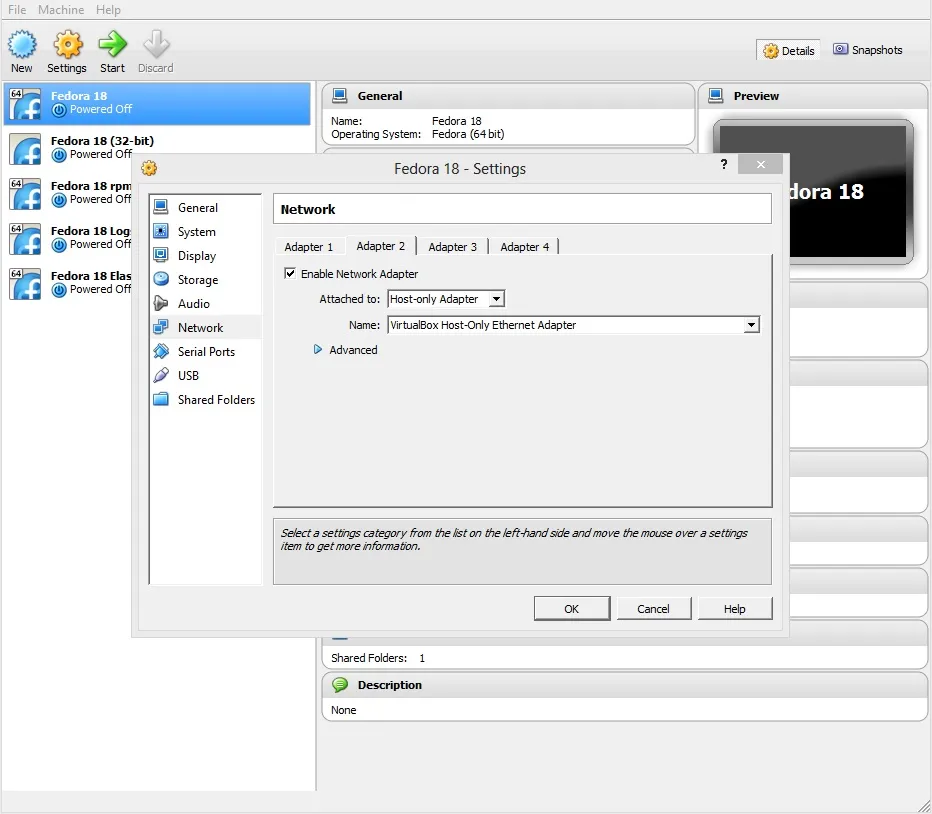
Step 4: Configure Adapter 2 (Host-Only)
We will now add a secondary network card that connects exclusively to your host.
- Click on the Adapter 2 tab.
- Check Enable Network Adapter.
- Set “Attached to” to Host-only Adapter.
Step 5: Start Your Machine
Once the adapter is enabled, start your virtual machine and wait for the Linux OS to boot.
Step 6: Find Your IP Address
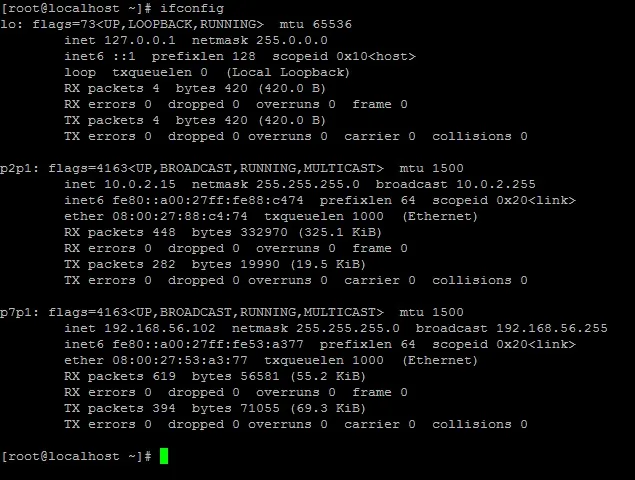
To SSH into the machine, we need to find the IP assigned to that second adapter. Run one of the following commands in the VM terminal:
ip addr
# OR
ifconfig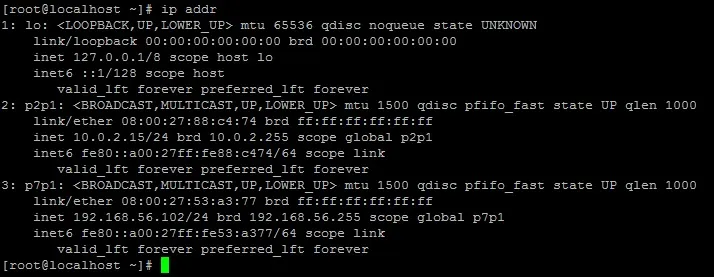
In my example, the IP address needed is the second interface (e.g., 192.168.56.102). This will likely differ for you, so look for the one starting with 192.168.56.x.
Important Updates:
- If you use GNOME, NetworkManager may sometimes conflict with manual settings.
- In newer Fedora versions, the second interface is OFF by default. To fix this, edit your config (e.g.,
vi /etc/sysconfig/network-scripts/ifcfg-p7p1) and changeONBOOT=notoONBOOT=yes, then restart your network service.
Step 7: Test the Connection
From your host machine (Windows or Linux), open your terminal or Putty and run:
ssh root@192.168.56.102Congratulations! You are now connected to your VM via SSH.
Extra Credit: Setting a Static IP and Hostname
Looking up a DHCP IP every time is annoying. Let’s make it permanent.
1. Identify the Interface Name
Find your interface name (e.g., p7p1 or eth1) using ip addr.
2. Edit the Network Configuration
Open the configuration file for that interface:
vi /etc/sysconfig/network-scripts/ifcfg-p7p13. Change to Static IP
Update the file with the following lines (adjust the IP to match your needs):
BOOTPROTO=static
IPADDR=192.168.56.102
NETMASK=255.255.255.0
ONBOOT=yes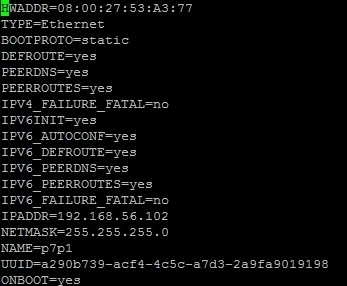
4. Restart Networking
systemctl restart network.service5. Map the IP in Your Host File
On your Host PC (not the VM), open your hosts file.
- Linux/macOS:
sudo vi /etc/hosts - Windows: Open Notepad as Administrator and open
C:\Windows\System32\drivers\etc\hosts
Add the following line:
192.168.56.102 fedora22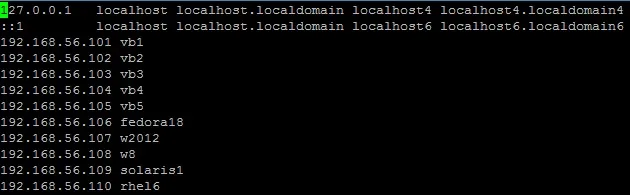
Now you can simply SSH into your machine using the name:
ssh root@fedora22